Call us today 0207 32 32 999
Written By: JustBoilers.com Experts | Last Updated: April 2022
You might never have given a moment’s thought to the task of isolating a radiator. However, one day you may well need to do it. While hiring a plumber to do the job for you is always an option, you might be surprised to hear that isolating a radiator is actually much simpler than many people think. In fact, you could learn to do it in just a few minutes.
Take a look at our brief guide to isolating radiators at home. Before long you’ll be able to isolate and remove any type of radiator in a matter of minutes.
Why would you need to isolate and remove a radiator?
There are a few different reasons you might need to remove a radiator. Painting and decorating will often require you to isolate a radiator and remove it from the wall. A leaking valve that needs replacing or fixing will sometimes require the radiator to be removed. Flushing the radiator out so that any buildups inside it can be removed will also require its removal.
What tools do you need to isolate a radiator?
To get started you’re going to need an adjustable spanner and a pair of mechanical grips, as well as a spare towel, washing up bowl and a radiator key. Make sure you have plenty of towels and tissues to hand to mop up any spillages. Then, it’s just a case of working through the following steps in order.
How long will it take?
Removing, clearing and refitting a radiator should take around 30 minutes. If you’re doing it for the first time, you might want to ask a friend for help. They’ll be able to help dry up any leaks and give you a helping hand when it’s time to lift the radiator off the wall and out of the way.
How to turn a radiator off
Your radiators are connected to an entire circuit of circulating water. So if you take them off the circuit without first isolating them, you’ll end up emptying the contents of the entire system on your carpet.
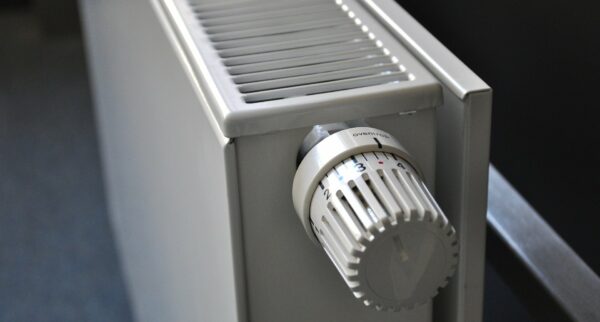
To ensure this doesn’t happen to you, pay attention to the two valves near the bottom of the radiator — there will be one on each side. You want to isolate the radiator from the heating circuit by turning both valves fully clockwise. That will mean that no new water can flow into the radiator, or back out of it. The only downside to this is that the water in the heater has nowhere to go.
Reach for your bowls and towels
It doesn’t matter which of the two valves you remove first. All you’re looking to do is drain all of the water from the heater. Pick a valve, put your bowl underneath it and then get ready with your spanner and towels.
Gently remove the first radiator isolation valve
If your radiator hasn’t been isolated and removed for years, there is a chance that the nut that holds the valve will be stiff and hard to move. Don’t worry, this is perfectly normal and not something to be overly concerned by. Keep calm and composed, and avoid the temptation to pull on the nut as hard as you can. All this will do is increase the chances of damaging one of the components and causing a leak.
If the spanner alone doesn’t do the job, find and return with an additional pair of grips. That will enable you to apply increased force to the nut so you can gently start to loosen it.
Drain the water as much as you can
Give the water plenty of time to leave the radiator and make sure to get every last drop out of it you can. Even just a few small drops coming out of the opening could still mean a litre or more of water in the main body of the radiator. The moment you pick it up and start to move it around, it will just come pouring out.
To accelerate the draining process, you could also open the bleed valve with the radiator key. That is located on the top corner of the radiator, and should be closed once draining is complete.
Remove the second valve
The two valves on your radiator do different things, but for removal all you need to know is they come off in precisely the same way. Reach for your spanner and grips, gently apply pressure to the locking nut and remove the valve as you did the first one. Keep a towel to hand to mop up any remaining drops that come out when you remove the valve.
Close the radiator inlets
Despite your best efforts, there will still be some residual water in the main body of the radiator. The best approach is to remove the heater and drain it outside by standing it on end. All you need to do before you can do that is close the radiator inlets.
Purchase dedicated stoppers, or improvise using something from your toolbox that won’t scratch or damage the inner faces of the connectors. Make sure you have a tight fit and then prepare to lift the radiator off the wall.
Lifting the radiator safely
A small radiator will be a comfortable one-person lift, but don’t be afraid to ask for a little extra help if you feel you need it. This will be particularly important if you’re doing it for the first time, removing a large radiator, or working in an enclosed space.
The radiator will typically be held on the wall with a pair of hanging brackets. To remove the radiator simply lift it straight up, making sure you have adequate clearance over any pipework that has been removed.
Putting it all back together
To reinstall your radiator, simply follow the above steps in reverse. Check everything is firmly tightened and attached, and that no damage has occurred during the fitting or removal process. Finally, make sure to repressurise your boiler by adding water to the circuit to make up for the water that you’ve had to drain.
If you need any further guidance isolating a radiator or help knowing how to turn a radiator off, don’t hesitate to get in touch with our team. We’re always happy to help.
Sources used:
