Call us today 0207 32 32 999
Written By: JustBoilers.com Experts | Last Updated: April 2022
Why do I need to drain my radiators?
There are several reasons why you might need to drain a radiator in your home. It’ll often be when you need to repair or remove it. It may not be working properly because gunge has collected at the bottom and is obstructing the hot water supply. On the other hand, it may be leaking, in which case you’ll have to turn it off to save the carpet.
Whatever the case may be, you’ll likely need to do this several times in your lifetime. We teach you how to do it here because we love giving away free information about our passion, central heating systems. Remember though, if you do get stuck or decide to use an expert then we’re only a phone call away.
There are several steps involved in draining your radiators. By following these steps carefully, you’ll be able to bleed your radiator lines properly. Then you’ll have them back to their original working order in no time.
There are several steps involved in draining your radiators. By following these steps carefully, you’ll be able to bleed your radiator lines properly, and will have them back to their original working order in no time.
How Central Heating Works in UK Homes
Most UK homes are heated by warm water from a boiler flowing through pipes and radiators. Generally speaking, these are trouble-free. However, modern radiators have their own connections just in case one causes any issues.
You’ll be glad to know you don’t have to drain the whole system down and lose all your hot water. However you should always turn the switch off at the main boiler control panel, and wait until the pipes leading to the radiator in question cool completely before attempting to drain a house radiator for replacement or repair.
How to drain a radiator without making a mess: What you need
While you wait for the pipes to cool double-check you have the following tools and equipment ready and in good order. You will also need an assistant to help you loosen and remove the various pipes and radiator as the job proceeds.
- Two suitable containers that fit under the radiator pipes
- Two old hand towels you don’t mind getting dirty
- A pen and notebook to record the lockshield setting
- A container of some kind to keep any bits of radiator you remove
- A medium-size pair of pliers or an adjustable spanner
- Several absorbent cloths for wiping up any mess
- Special tool to open the bleed valve and admit air
- A pair of stout gloves to protect your hands from harm
- A set spanner that fits the union nuts on the radiator
- A roll of fresh adhesive tape approximately a half-inch wide
- A plastic bucket and a bag for recycling the garbage
Step One – Preparing to drain a radiator
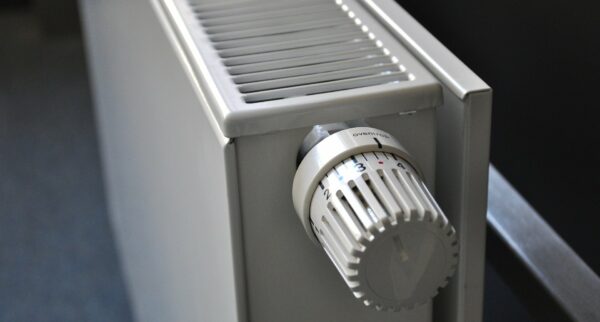
Locate the pipes on either end of the radiator. The one with the regulator control receives the hot water from the boiler, while the other one – the lockshield valve – sends it back again.
Fold the two hand towels separately into squares measuring a foot by a foot, and position them under the regulator and lockshield controllers. Set the two containers on top of these so as to catch water drips after you loosen off the pipes.
Step Two – Isolate the radiator
Isolate the radiator from the heating system by closing the two valves. The regulator side is easy. Turn the setting down to zero in a clockwise direction. The lock shield one is trickier so have your pen and notebook ready.
First, remove the small white cap to get access to the valve itself, and place this in the container for safe-keeping. Now use the pliers or adjustable spanner to close the lock shield fully going clockwise. Count the number of full turns and write this in the notebook.
Step 3 – Get ready to drain the radiator
Inspect the set spanner carefully to make sure the faces are still square. Do not use an adjustable or shifting spanner because it could slip and damage the radiator, worse still your hands.
Check the spanner fits both union nuts tightly and imagine you are using it to loosen the unions going anti-clockwise. Are there points where your spanner hand could bump something if the spanner slipped? Wrap an old cloth around that point if you can. Use the special tool to open the bleed valve two turns.
Step 4 – Loosen the union nut on the regulator side
This can be the trickiest stage in the procedure to drain a house radiator. That’s because this is the step most likely to spill water. Check the container is still in position under the union nut, and your assistant is standing by with absorbent cloths.
Now fit the spanner to the union nut on the regulator side of the radiator. Have your assistant steady the pipe while you turn the nut slowly anti-clockwise a quarter turn until water starts to bleed out into a container. Never force the spanner. If you can’t budge it you may need to find a gas safe engineer with special tools on our website.
Take your time by draining the radiator into the container. Tighten the union before it gets full, and discard the water before continuing. If the water does not flow easily, open the bleed valve a bit more to break the partial vacuum. The water flow will finally slow, and then stop completely.
Step 5 – Remove the couplings from the unions completely
Unscrew the union nut completely from the radiator on the regulator side and gently pull the supply pipe slightly away. Cover the pipe thread with adhesive tape to protect it from any bumps and knocks.
Now remove the union nut on the lockshield side of the radiator. Work carefully because some water may still drain. Move the drainpipe gently away. Protect the pipe thread as you did at the regulator end.
Step 6 – Remove the radiator and drain away the last water
Place the plastic bucket on the opened-out bag for recycling garbage conveniently nearby. Kneel at one side of the radiator with your assistant at the other end.
Cover the holes where you removed the pipes with one hand while you use the other one to pull the radiator upwards away from the wall bracket. Finally, drain the last of the radiator water into the bucket until it stops dripping.
Congratulations! You now know how to drain a house radiator safely, without making a mess.
